15 Oct 2013

Magazine Cover - Patrick Carney


I have chosen this as my second magazine cover which I will try to replicate.

8 Oct 2013

Final product


 Camera manual completed.


White balance


This shows the procedure from scanning in a drawing to using Photoshop to edit. I have shown the original image to the final image after the levels have been edited and it has been placed in the correct place.

Shooting modes and font


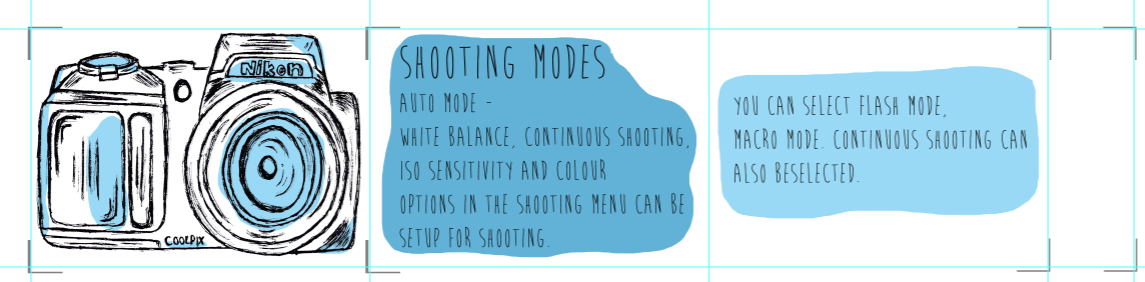
After I finished creating background for the text on the first page I scanned the shootings modes and copied them to Photoshop. Once they were copied to Photoshop I edited the levels so that they would stand out.

When I finished all the shooting modes and started to look at other fonts to make sure that I had the right font. When looking on Dafont I installed 'aracne' so that I could compare it to 'brainflower'.


After I had installed the font I started to compare it by changing some of the text. However I decided to stick with the original font as I don't think it was suitable.

Camera Photoshop and text background


When I first uploaded the camera drawings to Photoshop I wasn't keen on adding colour to them. However I started to experiment by adding layers which allowed me to start adding colour to the camera. I didn't want to use too many colours because it can become distracting therefore I used blue and changed the shade. This then made me think about the background of the text. I decided on using the darker blue when introducing a topic and the lighter blue when explaining the topic. I used different layers and the lasso tool to create this. When first using backgrounds for the text I was unsure whether to make the entire background  blue. However I thought by only creating a section then this will make the text stand out rather having the entire background blue. 

Font


As I had already written the majority of the text in my sketchbook I knew which type of font I wanted. I used BrainFlower' from Dafont as it was a handwritten styled font and was easy to read. 


Camera design scanned and updated


After drawing both views of the camera I scanned it so that I would be able to edit it in Photoshop.


However I decided to create another drawing as I thought my previous drawings were too neat for the style I wanted to use for my manual. I used both fine liners and biros when drawing as I wanted to create a darker effect. This also meant that by tracing over the images using a fine liner and biro the lines wouldn't be totally straight so it would create a more scruffy drawing. Both of these drawings were then scanned.

3 Oct 2013

Camera Manual Research


After using the Nikon camera manual to gather information I started researching for some designs. This would then help me when I started designing my own camera manual as I could incorporate these ideas into my final design.

2 Oct 2013

Camera Manual - Nikon Guide


Before creating a camera manual I used  a Nikon camera manual as part of my research. This allowed me to use it to gather information from and to copy any useful notes in my sketchbook. As I could then transfer these notes to Photoshop. Using the internet may have been an easier way for research as I would be able to copy any notes I wanted to include in my manual and change the notes around.